If you are planning to start a blog or make a website, one of the basic needs is a Content Management System (CMS). For beginners or those who have less knowledge of designing and developing websites, WordPress is the best.
But, just choosing by mind doesn’t create a site. You will need to perform some manual actions too. And the first step is installing CMS for the website. If your hosting plan includes an automatic WordPress installer, you can install WordPress easily using the auto-installer. But, if such a feature is not available, you have to install WordPress manually.
To help you on this matter, we have a detailed guide on how one can install WordPress manually. To install WordPress manually, you will need to download WordPress and install WordPress on cPanel or any other control panel of the hosting server by creating an SQL database, linking it, and running an installation script for it.
- How to Install WordPress Manually Without Softaculous on cPanel?
- Introduction to Manual WordPress Installation
- Step by Step Guide on How to Install WordPress Manually
- 1. Check Server Requirements
- 2. Download WordPress from WordPress.org.
- 3. Upload WordPress to Server (Hosting)
- 4. Extract WordPress.zip File
- 5. Moving Content Outside WordPress Folder
- 6. Creating a MySQL Database.
- 7. Creating Database User
- 8. Providing All Privileges to the Database User
- 9. Running Manual Installation Process
- 10. Providing Database Details to Install WordPress Manually
- 11. Providing Details for WordPress
- Summary
- Frequently Asked Questions
How to Install WordPress Manually Without Softaculous on cPanel?
Installing WordPress manually may sound daunting, but with this detailed guide, you can learn how to do it from start to finish. Below you’ll find step-by-step instructions, visuals, tips, and FAQs to make the process easy for beginners. By the end, you’ll have the satisfaction of setting up WordPress completely on your own!
Introduction to Manual WordPress Installation
Before jumping in, let’s look at exactly what manual installation involves and why you might want to do it yourself rather than use an auto-installer.
What Does Manually Installing WordPress Mean?
Manually installing WordPress means uploading the WordPress files to your web server and configuring everything yourself rather than using an automated installer.
You follow a step-by-step process to:
- Get the required WordPress files
- Create the database
- Upload WordPress
- Configure settings
- Run the installation scripts
It’s more hands-on than auto-installation but gives you full control.
Why Install WordPress Manually?
Here are some of the top reasons to install WordPress manually:
- Your web host doesn’t have an auto-installer like Softaculous
- You want to learn how WordPress configuration works
- Installing WordPress into a subdirectory
- Fixing installation problems
- Optimizing the process
While a bit more complex, manually installing WordPress is a great learning experience.
Manual vs Auto-Installation
The main difference between manual and auto WordPress installation is:
Manual
- You do all the steps yourself
- Works on any host
- More control and insight
- Better for learning
Auto
- Scripts handle the process for you
- Very fast and easy
- Ideal for beginners
- Limited flexibility
Now let’s look at how to manually install WordPress from start to finish.
Step by Step Guide on How to Install WordPress Manually
If you are having trouble setting up your website on your hosting server because you are not provided with the automatic installer in your hosting plan, then this detailed guide on how to install WordPress manually on cPanel or any other server without an auto installer will help you.

1. Check Server Requirements
Before installing WordPress, your web server needs to meet some minimum requirements:
- PHP 5.6 or higher
- MySQL 5.6 or higher
- Ability to create databases
- File upload permissions
- mod_rewrite module enabled
Here’s how to check for these on cPanel shared hosting:
Verify Your PHP Version
- Login to cPanel
- Locate the “Software Information” icon
- Check that the PHP version is 7.4 or greater
If not, contact your host to upgrade PHP.
Verify MySQL Version
- In cPanel, open the PHPMyAdmin tool
- On the main dashboard, it will show the MySQL version
Again, should be 5.7 or higher. In the case of MariaDB version 10.4 or greater is recommended.
Create Database/Users
- In cPanel, go to the Databases section
- Try creating a test database and user
- Make sure you can assign user privileges
This confirms database access is allowed.
Check File Permissions
- Use cPanel’s file manager to upload a test file
- Check if you can delete the file after
Able to upload/delete means sufficient file permissions.
mod_rewrite Module
- Create a file .htaccess in public_html
- Add a random text line and save
- Load your site – if no 500 error, mod_rewrite is enabled
That validates the key requirements for manual WordPress installation.
2. Download WordPress from WordPress.org.
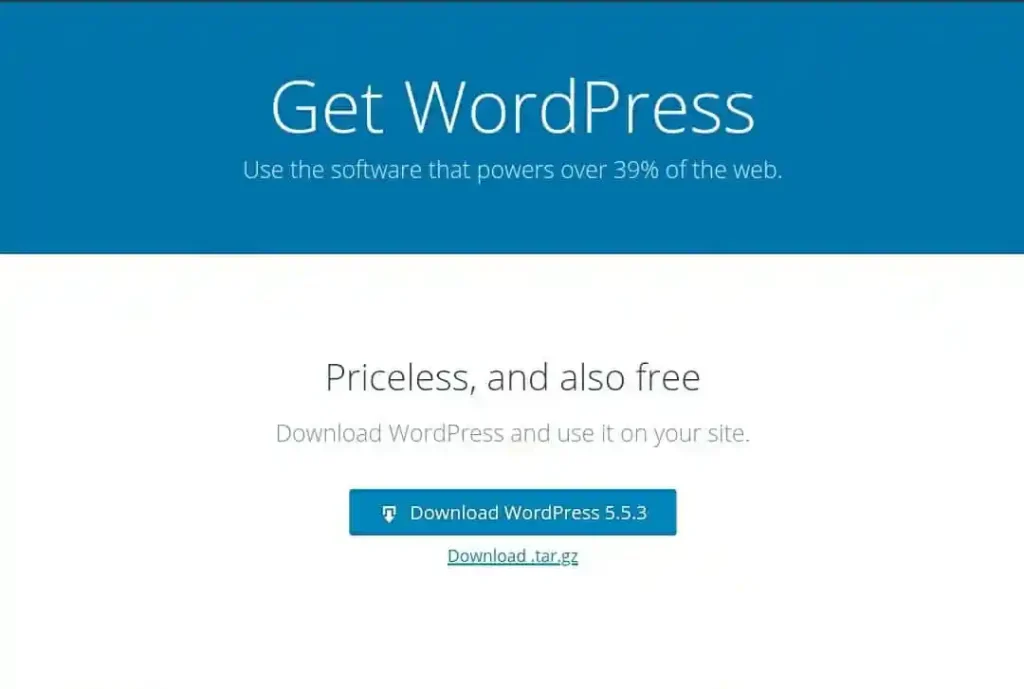
Since WordPress acts as a content management system like software does on your computer, you have to install WordPress on your server. Therefore, initially, you will need to download WordPress CMS from the official website of wordpress.org to install WordPress manually on your server.
Simply go to WordPress and download the WordPress.zip file on your computer’s storage. This will download a ZIP file called wordpress-x.x.x.zip where x.x.x is the current version number. Save this ZIP file on your local computer. Do not extract it yet. We’ll upload and extract it on the server. This ZIP contains everything needed to install WordPress.
3. Upload WordPress to Server (Hosting)
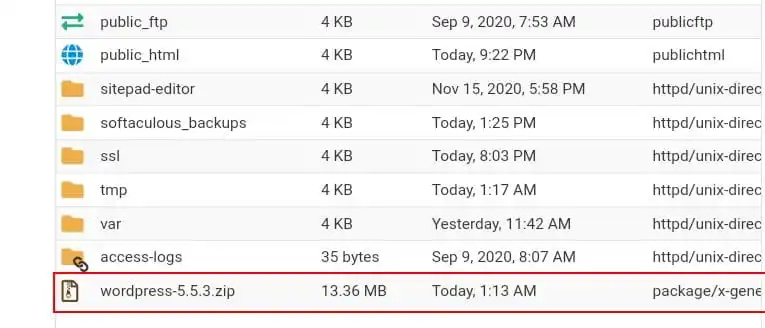
Now you have your WordPress ZIP package and created an empty database. Time to upload the WordPress files to your web host.
Via cPanel File Manager
- Login to cPanel
- Go to Files ➜ File Manager
- Navigate to public_html folder
- Upload the wordpress.zip file
Via FTP
- Get your cPanel FTP credentials
- Use an FTP client like FileZilla
- Connect and upload wordpress.zip to public_html
Upload to public_html directory or a subfolder if installed in one.
Do not extract the ZIP file yet – we’ll handle that next!
4. Extract WordPress.zip File
After uploading the WordPress ZIP file, it’s time to place the core files at the domain/ subdomain/ directory or subdirectory where you are willing to install WordPress.
If you want to install WordPress on the main domain of your cPanel, you can extract the file from the public_html folder. But if you want to install it on yourdomain.com/blog directory, you have to extract the core files of WordPress at the blog directory created inside public_html.
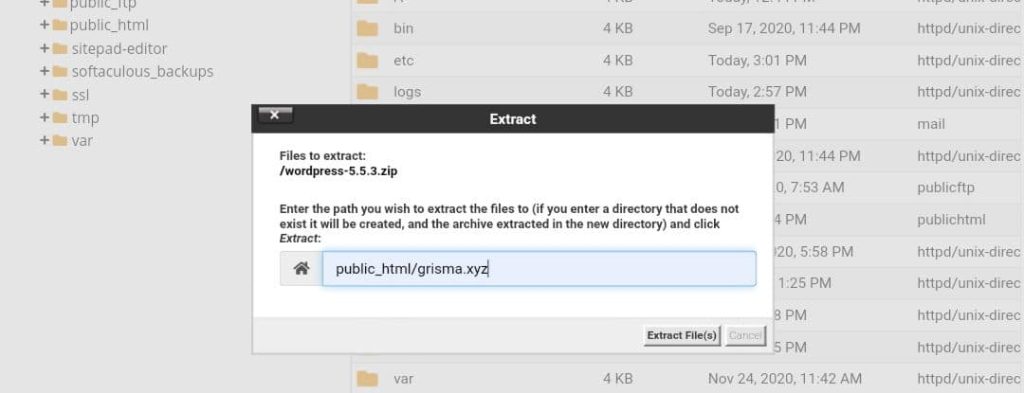
Similarly, if you want to install WordPress manually on an Addon Domain or Subdomain, you have to locate the relative folder of the subdomain or addon domain. In newer versions of cPanel, they may be in the home directory, and in some cPanel, they may be located inside public_html which can also be moved outside the public_html folder.
5. Moving Content Outside WordPress Folder
When you extract WordPress, it creates a folder named WordPress inside our target directory. If we let the folder remain as it is, WordPress will be installed on example.com/wordpress.
To avoid this, select all the contents and move them outside the WordPress folder to the domain folder. In my case, it is m.grisma.xyz where I wish to install WordPress manually.

But, if you want to create your site address looking like example.com/blog for blogging only, change the name of the WordPress folder to blog.
This will install WordPress manually on the subdirectory of your domain or subdomain. And the root directory i.e example.com can be used for other purposes.
6. Creating a MySQL Database.

The database is the brain of a WordPress site and WordPress CMS itself is a body. To make the body functional, you will need a brain connected to the body. We will learn to connect databases with WordPress in the coming steps.
Generally hosting services provide a MySQL database. If there is no SQL database, there must be another database. To create a database, you will need to go to MySQL® Database Wizard and give a name. In my case, I gave ‘main’ as a name, but the whole grismacom_main is the database name.
Please note the database name somewhere or just remember it. After giving the database name, click on the next step which will lead you to the database user creation page.
7. Creating Database User
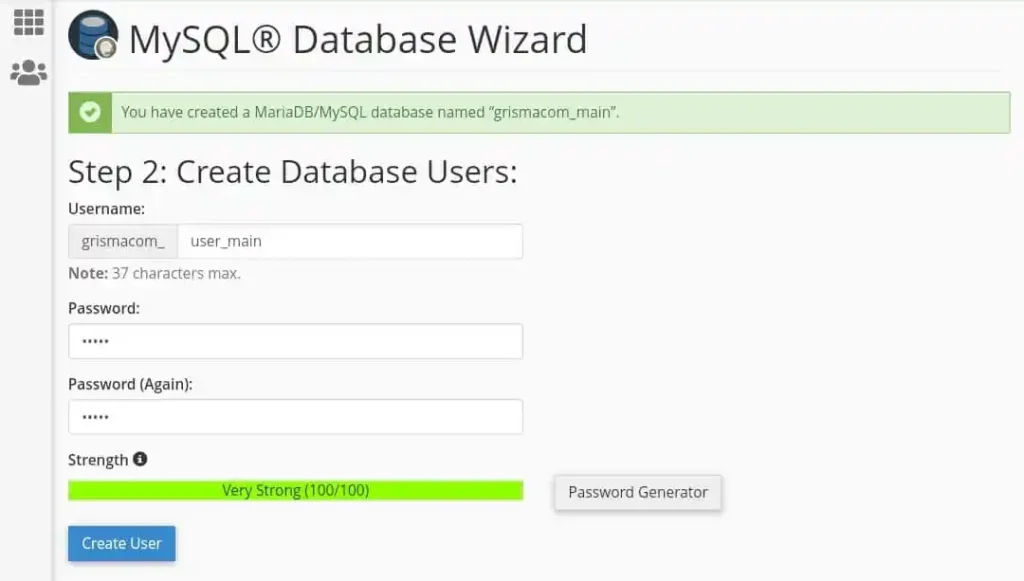
The next thing required to install WordPress manually is creating a MySQL database user. Give an appropriate name for the user and an acceptable strength password. It is recommended to give a username related to the name of the database to reduce confusion. Again, note the database username and password.
8. Providing All Privileges to the Database User
The user created above is provided to WordPress. WordPress will use this user to get access to your particular database, alter, create, delete, trigger files, and many other actions. Therefore, provide all privileges by giving a tick on All Privileges.

Then click on the Make Changes button, which will save the privileges settings. After doing that you can finally click on the Next Step button to finish the work on phpMyAdmin.
9. Running Manual Installation Process
After creating a database, you will need to run the installation script. To initiate WordPress installation manually go to the URL where you have placed WordPress files. For example, If you have placed WordPress inside example.com/blog, go to example.com/blog.

Otherwise, simply go to example.com. This will redirect to URL/wp-admin/setup-config.php which will subsequently land you on the language page. On this page, you have to select the preferred language on which you want to set up your website and see the dashboard, then click on the Continue button.
After clicking on the continue button, you will be provided a page with a detailed guide about providing the Database name, user, and password.
10. Providing Database Details to Install WordPress Manually
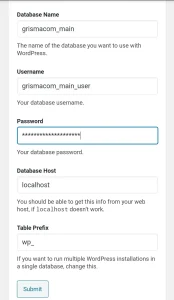
In this step, you will need to provide details of the Database name, database user, and password which I previously mentioned to save/remember. Let the Database host be as it is, i.e. localhost, and leave the table prefix as it is.
For the majority of hosting, the Database hostname is localhost, in some cases, you might need to change the Database hostname. In such a case, contact your hosting provider. After providing these details, click on the Submit button.
Alternatively, you can also enter your database details in your wp-config.php file directly to avoid the above process. For this, form the FTP locate:
Configure wp-config.php

With the database connected, you need to configure the core settings file wp-config.php:

- Locate the wp-config-sample.php file
- Rename it to wp-config.php
- Edit the file:
- Update the DB Name, Username, Password, and Host
- Save changes
- Upload updated wp-config.php to your host
This file tells WordPress how to connect and communicate with your database. It’s a crucial part of the setup.
11. Providing Details for WordPress
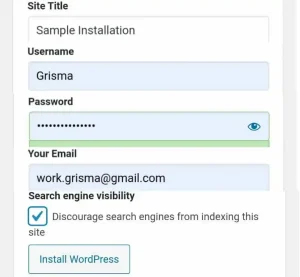
This is the final step to installing WordPress manually on cPanel. This step requires you to provide your site name and then a username, password, and email address for login.
It also provides a search engine visibility field. Keep the box unchecked to ensure the indexing of your site by a search engine.
By completing all these steps, you will be able to install WordPress manually on cPanel. To log in to your site’s Dashboard, go to example.com/wp-admin or example.com/blog/wp-admin, depending upon the installation directory. From Dashboard, you will be able to manage almost everything on your site.
Summary
You may already know or have seen how someone can install WordPress with WordPress Installer Apps. After reading this blog, you should be clear that WordPress can be installed manually too.
If the hosting service provider does not provide an automatic WordPress installer, simply following the steps mentioned above can solve your issue.
Frequently Asked Questions
Can I Install WordPress Without creating a Database?
No. You can not install WordPress without creating a database during a manual installation.
WordPress, a PHP-based CMS requires a database that works as the brain of WordPress.
You can install WordPress without creating a database only when you are using an auto-installer that itself creates and uses the database required to install WordPress.
Can I Install WordPress on a Subdomain or Subdirectory?
Yes. You can install WordPress anywhere whether it is a subdomain or subdirectory.
You will need to choose the installation path and you will be able to install it anywhere.
How Long Does it Take to Install WordPress Manually?
Generally, the manual WordPress installation process takes 5-10 minutes. But, if you are a beginner or installing by reading instructions, it may take up to 20-30 minutes.
Why My Installation is Unable to Establish a Connection with the Database?
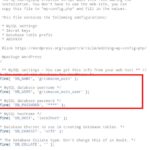
If you provide the wrong details of the database and database user, WordPress will be unable to connect with the database required for WordPress.
If the above-mentioned process fails anywhere, reconfirm or recreate a new database and provide the same with the wp-config-sample.php file which is somewhere in the crowd of extracted files.
First, you will need to change the name of wp-config-sample.php to wp-config.php
Right-click and click on edit and provide the database details in it.
How Do I log in to WordPress?
After installation, it will land you on the page which will provide an option to log in.
If you missed that, by going simply to example.com/login or /wp-admin you can log in to the WordPress dashboard.
If you have installed WordPress on the subdirectory consider adding the subdirectory in the login URL.
For example domain.com/blog/wp-admin.